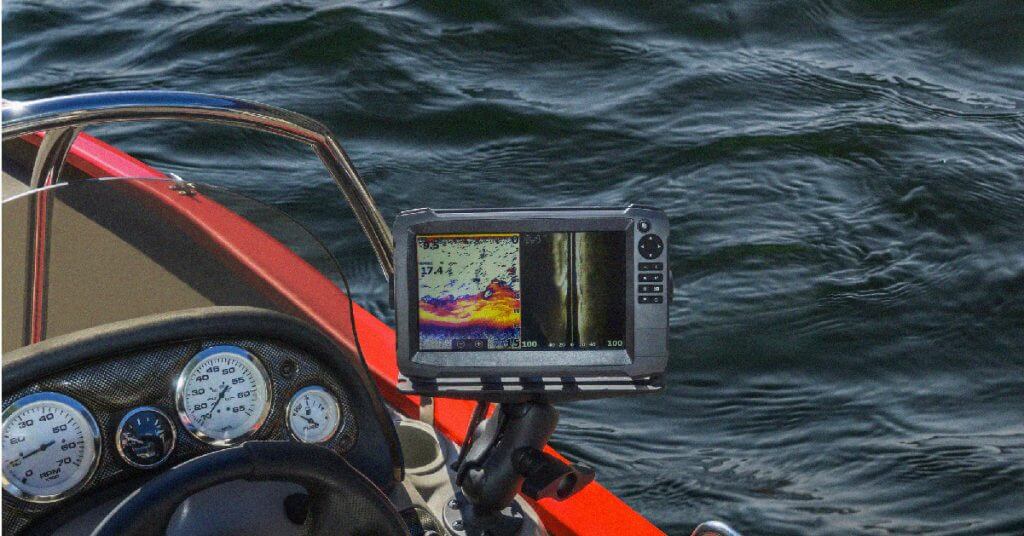
If you know how to read a fish finder, you know how powerful these tools are to us anglers.
Down imaging fish finders send sonar down vertical from the boat, and side imaging sends sonar horizontally away from the boat.
Both of these fish finders have their place on the water, and knowing how to use them, how to interpret the images, and how to translate that into a fish is the key to success.
I’ve used dozens of fish finders ranging from basic to extremely advanced, and I’ll tell you what, they all do the same thing!
Here’s my take.
How to Read a Fish Finder?
In this YouTube video by YourBassGuy.com Community Coordinator Wesley Littlefield, we take a quick look at how to read a depth finder.
Understanding how to use a fish finder is the key to having success with one. They do a lot more than let you see pictures of fish underneath your boat. You can also see how they’re taking to your lure, if the presentation is holding up, and what might be obstructing them from coming after your bait.
Best of all, knowing how to read a fish finder helps you to see where schools of fish are bunching up so you can know exactly where to drop your bait.
The most important thing you need to know how to do, though, is identify fish on the fish finder, and the fish scanner will display two different types of images.
Fish Icon
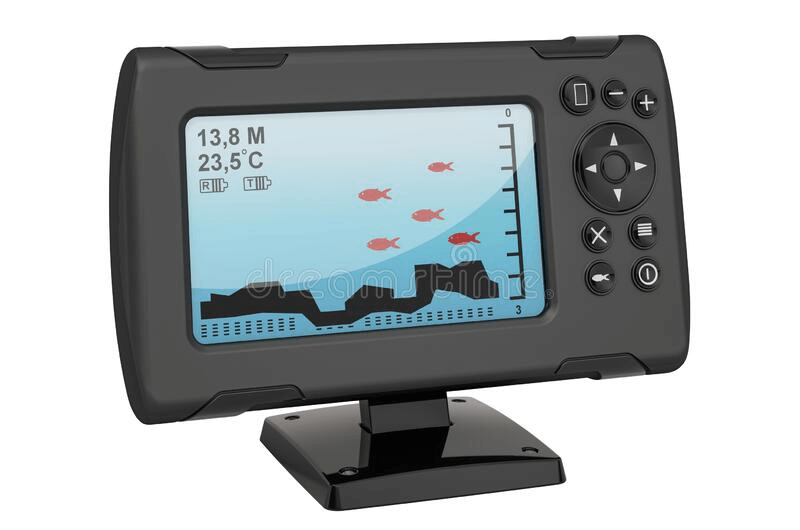
The fish icon is a result of the Fish-ID technology. This type of fish finder helps you find fish by actually converting the sonar technology into images of fish. It makes for a user-friendly display, and they even include different sizes and lengths so you can get an idea of whether or not it’s worth casting there.
Best of all, this type of fish finder also displays vegetation, rocks, and schools of fish. All you need to do is look at the fish finder screen and read the icon paired with the depth on that display. Once you’ve done that, you’ll know how deep the fish is and how big it is.
Of course, if this was a perfect world, everyone would do this, and we’d be hooking fish all day long. There are always downsides, and no fish finder is perfect. While the Fish-ID technology is solid, it sometimes thinks that bunches of plants and rocks are schools of fish.
It can stir you wrong, but you’ll be able to get an idea of its accuracy after some time using it.
Fish Arch
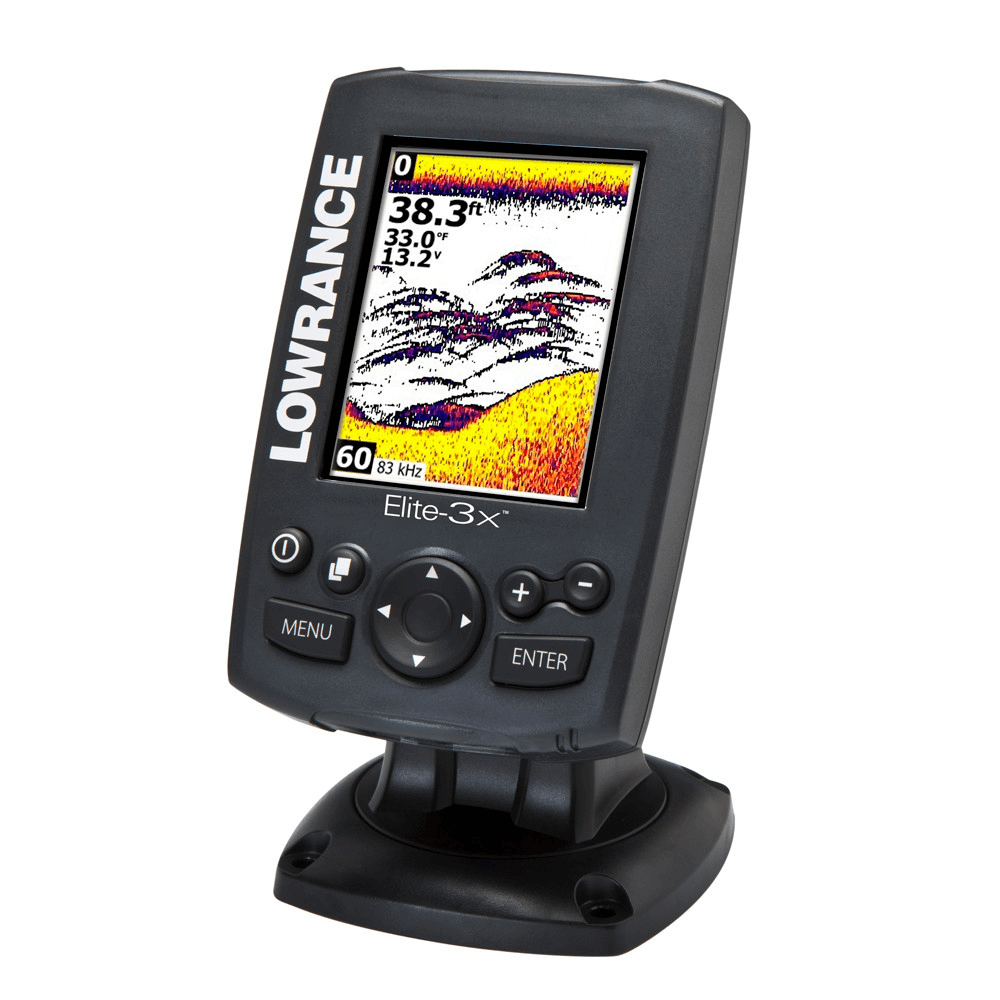
If you don’t have Fish-ID, then you’ll have an arch fish finder. I prefer these because I find them to be more accurate, and once you understand how to differentiate a fish from a rock or a piece of underwater grass, they’re much better to use.
You’ll identify the fish as small or large arches in the water. The larger the arch, the larger the fish, simple, right? The reason they’re more accurate is that they’re not trying to determine what’s a fish and what’s a rock.
Everything, including grass, rocks, logs, and fish, are all indicated by arches, but you’ll eventually learn how to tell a fish from a bunch of vegetation.
Judging Fish Size
If you’re after a certain species or size of fish, you’ll need to learn how to judge the size of the fish based on the arch that you’re seeing. The reason this is so much more accurate is that it takes a bit of time and work to figure out.
With the Fish-ID fish finders, the transducer does the work for you, but it also takes away some of the accuracy because it can’t get it right every time.
You’ll want to look horizontally at the arch and measure it from end to end. Then, take a look at the arch and measure it vertically, and you’ll get the thickness of the fish.
Over time as you do this, you’ll eventually be able to determine that a certain length and width on the fish finder equals a certain size in the water. You’ll familiarize yourself with those comparisons and be able to make better fishing choices as a result.
Let’s break it down a little more.
Fish Arch Length
You’re dealing with an arch and not an actual image of a fish, so you have to play a little guessing game to determine how big it is. Now, a longer arch doesn’t always mean a bigger fish.
When we look at the length, we’re not actually measuring the length at all; we’re measuring time. What you see on the fish finder screen pertains to the location of the fish. So, if you see a shorter arch, it doesn’t actually mean that the fish is small; it could simply mean they’re not moving that much.
On the flip side, you could see a very long arch, get all excited, drop your line, get a bite, and end up with something embarrassing at the end. The general consensus among anglers is not to worry too much about length because it’s a non-factor for most people.
Fish Arch Width
The width, on the other hand, is what we want to look for if we’re trying to determine how big our fish is. Whether you’re using a side imaging or bottom imaging fish finder, the thicker the arch, the bigger the fish.
If we’re trying to determine the best fish to target, we might want to go for a short but thick arch if we’re offering a slow presentation because that fish might be lethargic.
When we’re trying to target fish with a faster presentation, we might want to try the longer arches because they might have enough energy to chase us around. Of course, this is all up to personal preference, and there’s nothing more than skepticism here, but you’ll learn as you go along.
Half or Full Arches
The best visual I can come up with here is the idea of shining a flashlight into a completely pitch-black room. The light coming from the flashlight shines like a cone, just like a fish finder does.
If a cat walked into the light halfway and then turned around and walked away again, you would have only seen half of the cat and not known what the other half looked like. Fish finders work the same way.
On the screen, you’ll see a half fish arch and a full fish arc. All that means is that some of the fish swam directly into the sonar rays of the transducer while some came close or barely within its range.
If you have a half arch, it doesn’t mean that the fish is smaller than the ones with a full arch; it simply pertains to their location in the water.
Finding Baitfish on Your Fish Finder
To tell a baitfish from a larger fish, you’ll want to look for dots, lines, and dashes. Oftentimes baitfish travel in schools, so the combination of all of these may appear as one big blob. That’s the primary way to tell if you’re looking at a school of baitfish or vegetation under the water.
There are a few ways to tell, though:
- Most fish finders will use a different color for baitfish in comparison to vegetation. Most baitfish are colored yellow.
- You can tell a baitfish from vegetation by seeing where it is in the water. Baitfish are usually suspending where vegetation is closer to the bottom.
- Baitfish sometimes look like a cloud or cluster on the display screen rather than individual dashes and lines.
Small fish like crappie and bluegill may identify in the same way. These types of fish may appear as dots on the fish finder display instead of lines.
Spotting a Trophy Fish on Your Fish Finder
The easiest way to spot a trophy fish on the fish finder is by looking at the width of the arch. It doesn’t matter if you have a full arch, and it doesn’t matter how long it is. We’re focusing entirely on the thickness of the arch to determine how big the fish is. This is the main indication of a big bass.
I’m a firm believer in taking everything into consideration, so you’ll want to pay attention to length and full/half arches, but in terms of size, the thickness is all that matters.
Identifying Different Types of Underwater Structure
So, obviously, knowing how to read a fish finder screen to find fish is important, but what about underwater structure? The structure we find underneath the surface can tell us a lot about what type of fish we’ll find there, what size, and how easy it will be to catch them.
That said, all the features we’ve discussed so far are irrelevant because you need to understand depth charts to be able to identify the underwater structure. As mentioned, everything shows up the same on a fish finder, so the depth finder is where we can ignore the fish and focus entirely on the structure.
The depth finder lets you see how deep the water is, and it will give you an idea of what kind of fish you’ll catch there.
What I recommend doing is trolling slowly through the lake or river to get a feel for changes in the depth range of the water as well as water temperature. The temperature is important based on what time of year you’re fishing because it will tell you how active the fish are and which species you should target based on the water temperature.
In addition to depth and temperature, we need to identify the structure so let’s see how we do that.
Vegetation and Weeds
If you find spottier returns or vertical lines, you’ve found vegetation and weeds. This is important because we know this is where the big fish are hanging out. So, if you can manage to put two and two together, you’ll find larger fish in the areas where there are plenty of vertical lines.
Depressions
Depending on what type of fish you’re targeting, you’ll care a lot more about depressions. Bottom-feeders like carp and catfish are known for hanging out in depressions, so you’ll want to look for these if those fish are your goal. All you’re looking out for here are v-shaped changes in the contour of the bottom.
As you’re trolling along, many fish finders allow you to set pins at certain locations so you can come back and revisit them.
Points
One of the most important things to keep in mind when learning how to read a fish finder is that a wide sonar beam might offer more range in terms of what you can see, but it’s less accurate, and it won’t pick up as much because you’re spreading the frequency too thin.
If you use narrow sonar waves, you might miss some images because you’re narrowing in too much, but the images that you do get will be spot-on, accurate, and very thorough. I recommend starting out with a wider beam and narrow it in until you find that sweet spot.
A narrow beam will allow you to pick up on slight drop-offs where a wider beam would miss those.
Other Objects
What about other things under the water? Sunken ships, cars, old nets, and other items can be ideal locations for fish to hide and in fact, bass are well known for hiding in these areas. While you might not find a whole lot of sunken cars at the lake near your house, you never know what you can find, and it’s important to identify these things.
The best way to find unique underwater structure is to slowly troll throughout the lake while keeping a medium-sized cone, so you’re not missing too much, but you’re not so wide that you aren’t properly identifying contour changes.
A great strategy is to start wide and narrow it in when you find something interesting. For example, you can troll along with a wide beam until you see a sudden dip or point in the contour. Stop the boat, narrow the beam, and see if it looks any better now.
Judging Bottom Types of Hardness
Something else you want to know when learning how to use a fish finder is identifying different types of bottoms. Where we fish can vary between hard rock, soft mud, and grainy sand, and the methods we use to fish should change slightly based on these factors. This knowledge will help you become the best angler you can be.
Thickness
The thickness of the line associated with your transducers chirp will tell you a lot about the bottom of the water you’re fishing. For example, if the echo returns a thick line and a loud echo, you’re dealing with a hard bottom that might be rocky.
If it returns a quiet echo and a small line, you likely have a soft loamy bottom. So, why does this even matter?
For one, it can tell you what kind of lure to use. Certain lures like crankbaits work best in rocky areas because the noise and presentation is created by the lip banging off the rocks.
If you’re dealing with soft soil on the bottom, you might also have a better chance of catching bottom feeders that rest in the mud like catfish and carp.
Color
This factor will only make a difference if you have a color fish finder, which is most common today. If you have a black and white one, this won’t matter as much to you.
Returning to the transducer echo line, the darkness of the color palette also determines how hard the bottom is. So, if you have a lightly colored line, it means that the bottom is soft. If you have a strong colored line and a loud echo, you’re likely dealing with a hard bottom with a lot of rocks.
This can also help verify the notion of dense vegetation as well. Most of the time, vegetation will only grow out of rocky bottoms, so if you’re seeing a lot of vegetation on the screen and you’re getting a powerful and darkly colored echo, the area is likely rocky with plenty of vegetation.
2nd Returns
Sometimes you’ll see a second line underneath the line that displays the bottom of the water; this is called a 2nd return. A 2nd return happens when something hard causes the sonar to bounce off and return to the bottom again.
2nd returns can often indicate structure that doesn’t belong, such as a fallen tree, debris, a sunken boat, and other similar objects. If you receive a 2nd return on the fish finder screen, it’s worth narrowing the beam a little to see if you can get a better idea of what it is.
FAQs
Now let’s take a look at some of the most frequently asked questions revolving around how to read a fish finder.
What is down imaging on a fish finder?
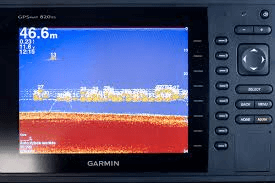
Down imaging is like traditional sonar or chirp sonar on a fish finder. The transducer sends sonar down under the boat, and it bounces back with fish arches and vegetation. You don’t cover as much water with this method, and the information is limited, so the images are low-quality.
Much of the time, images of fish and vegetation become jumbled together as a big cloud, which can make it impossible to tell that there are actually fish in there.
Down imaging fish finders are beneficial at identifying bottoms because they’ll provide clear differences between hard and soft bottoms. They also work well in deep waters and at faster boat speeds.
While they get the job done on many occasions, they’re not as accurate as side imaging fish finders because you can’t tell what side of the boat the fish is on, and the images are hard to see.
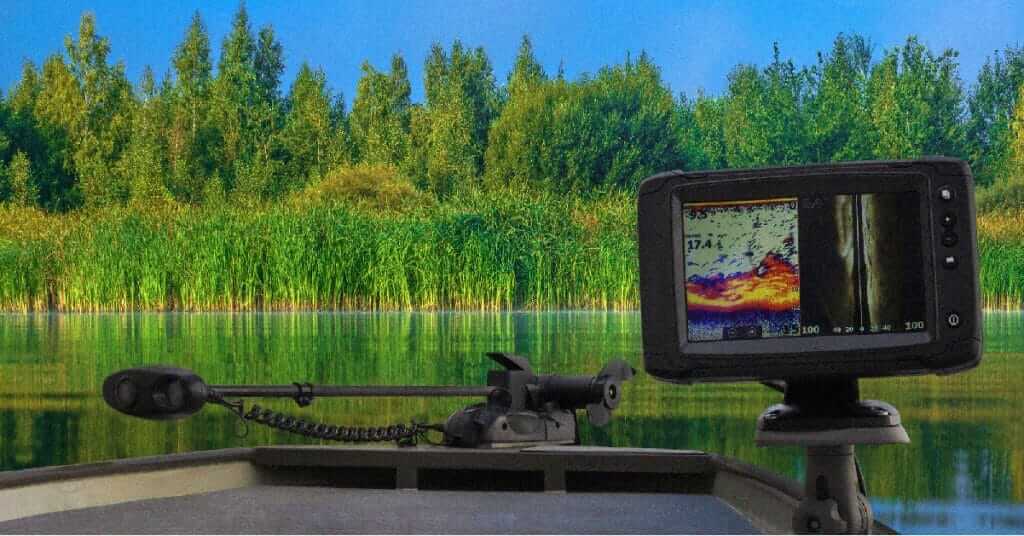
How to read side imaging?
On the other hand, side imaging is nice because the transducer sends sonar sideways away from the boat. As a result, you get better quality images and a stronger idea of where fish are located in the water column.
You’re able to tell more about the depth reading of the fish based on its shadow. The distance between the fish and the shadow will help you determine how high the fish is suspending off the bottom.
Many newer fish finders offer both side and down imaging, so I highly recommend going with that because you’ll want to have both options if you’re trying to make the most out of your fish finder.
Which is better, down imaging or side imaging?
As I said, they both have their pros and cons, so it’s hard to pick just one. I recommend having both down and side imaging because you can make up for the lack of attention in one area.
Down imaging is much more effective in deeper waters where side imaging would make it impossible to tell how close to the bottom the fish is. If you’re fishing shallow water, a side imaging fish finder will work well because you won’t have to worry as much about the depth of the water, and you’ll get a clearer picture of the vegetation and structure situation.
I think that down imaging fish finders offer a little more control over the image you get. Since you can narrow the beam down, you are able to scan broadly and then narrow it down when you find something that catches your eye.
What is the best frequency for a fish finder?
This right here is a tremendous pro-tip so pull out your pen and paper. Many anglers think that frequency doesn’t matter or that the changes are so minimal that they’re almost unnoticeable. That couldn’t be further from the truth.
Finders with higher frequencies will show better detail and work more efficiently at different speeds. Lower frequency finders cover more depth and have a much wider cone but deliver poorer quality images.
Finding a dual-frequency fish finder with both 200hHz and 50kHz is the best choice because you get the best of both worlds. You’ll want to use the 200kHz in shallow water and if you’re scanning quickly. Then, you’ll use the 50kHz into the deeper waters offshore, slow it down, and scan more carefully at deeper depths.
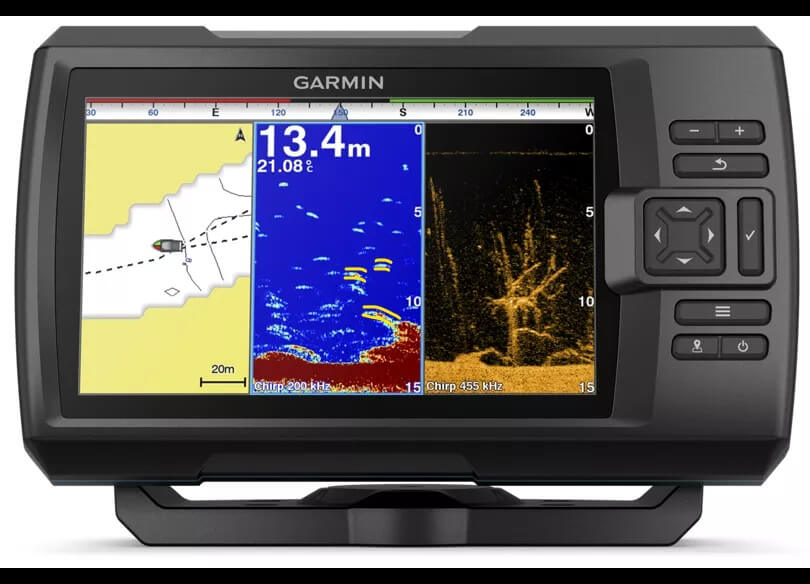
What is the best fish finder?
I’m a big fan of the Garmin Striker Plus 4. This GPS combo dual-beam fish finder offers great images and exceptional reliability.
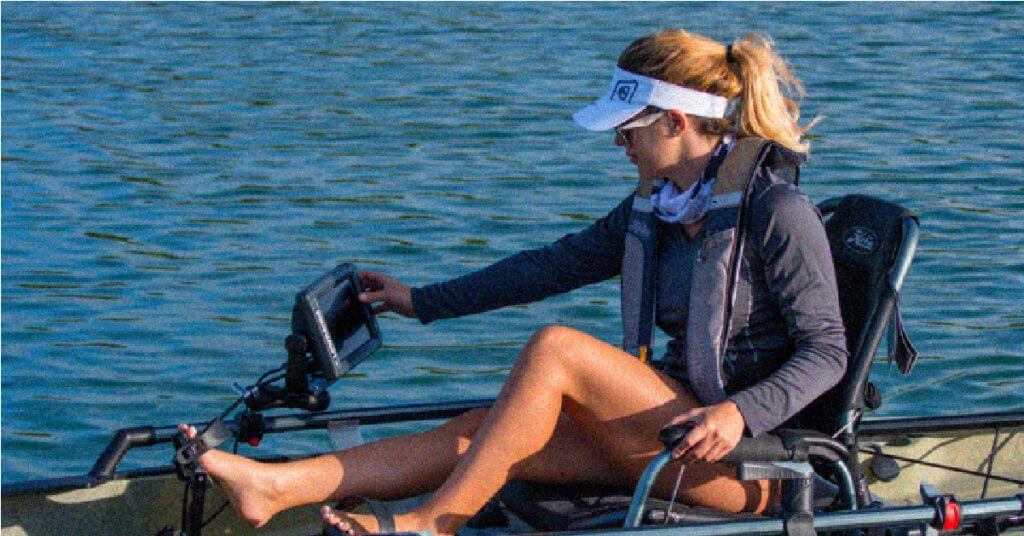
With that being said, I suggest going with brands you know. Humminbird, Lowrance, Garmin, and Helix are the brands you want to go after. The best option also depends on whether you need fish finder for a kayak, ice fishing, and what types of fishing you’re going after.
Final Thoughts
Remember that knowing how to read a fish finder and knowing how to interpret those readings are two different things. Anyone can know what they’re looking at, but you need to know what to do with that knowledge once you have it.
By now, you should have a solid understanding of how to use a fish finder, how to identify fish, how to identify structure, and which fish finder you should choose based on your fishing preferences.
Now, get out there and catch some bass! Good luck!

How do you tell a very stony patch of gravel type size rocks on a fish finder? What type of return will it show on the fish finder eg thin, thick or something else?
It depends on what type of view. Rocks will usually be indicated by a deep red almost maroon color. If it’s small gravel it might be less defined. On a sidescan, the darker the color, the more defined/hard the bottom is.
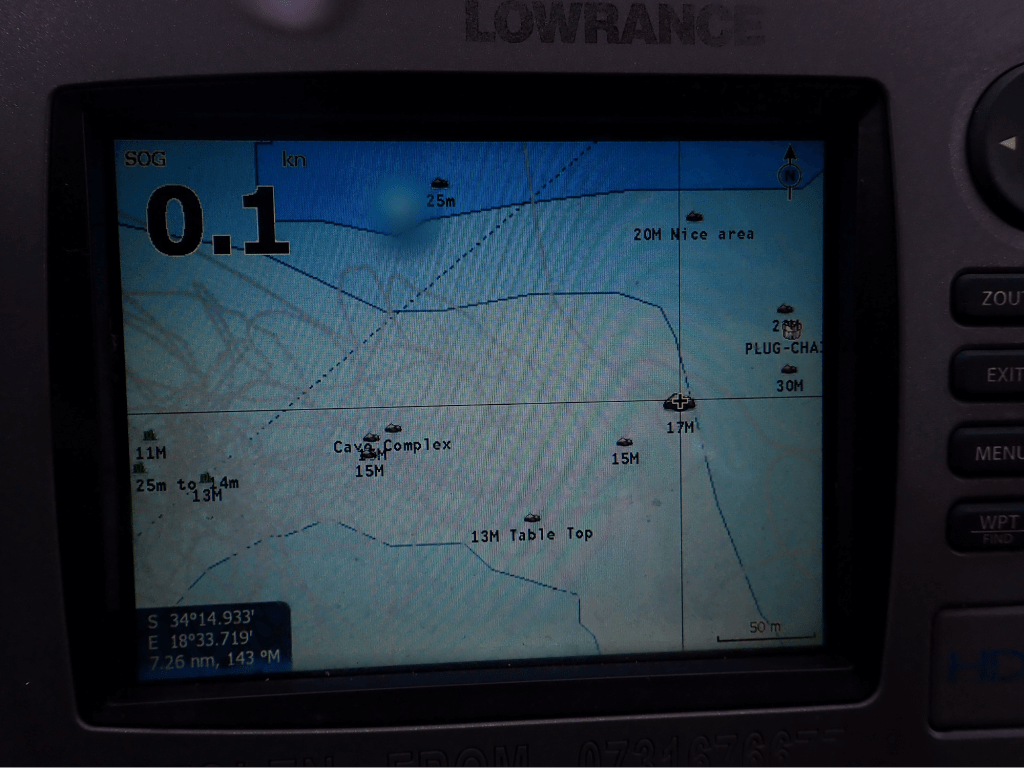
Probably a stupid question, but when trolling, the map is constantly updating. The images that are on the screen first, in what direction are those fish? Ahead of the boat, directly below the boat, are going over them, or behind the boat already and we need to go back? I have asked a lot of people this and everyone seems to have a different answer, so thought I would try here as you are very detailed and have a lot of expertise. (Lowrance HDS-9)
That’s actually a great question because it confuses a lot of people. So, the map is constantly updating but it’s always going to be a few seconds behind so I find that the readings I’m getting are usually right beneath the boat or actually a notch behind the boat. If I was trolling the shore, I’d drag my lure behind on the side of the boat as I’m reading the fish finder with the hopes of that being the most accurate.
Of course, the rules always change based on the unit you’re using. Some are a little quicker than others but I find this to be the safest option.
I appreciate you reading!