Understanding how to install a fish finder is the key to getting the proper performance out of it. I’ve dealt with plenty of fish finders and a ton of boats and let me tell you, there’s no reason to overcomplicate it. There are many different ways to mount the unit and transducer and you can wire them in a few different ways also.
The most important thing you can do is take the first step. If better fishing is what you desire, then a fish finder should be on your list of to-dos. This guide will help you get started!
Content
Necessary Supplies and Tools

Having the best new fishfinder on the market is useless if you don’t have the proper tools and supplies to install it. You’ll want to look for a few important things first before assembling your fish finder grocery list.
See if you have accessory power wires already, check the transom to see what it looks like, do you have a jack plate? So on and so forth.
This pre-installation check-up will help you determine what you need to buy, how you’re going to install the fish finder, and to what lengths you’ll have to go to get it installed. The last thing you want to do is run to the hardware store a bunch of times when you could be out on the water.
Once you have a solid idea of what you’ll need, dive into this checklist, and pick and choose what you want.
Fish Tape
Fish tape is a useful tool for a variety of reasons and if you do a lot of fishing, you should have some of this anyway. You’ll use it to run power cables from the unit to the power source of the cranking battery. It’s a flexible flat steel that is just pliable enough for you to push and pull it under the gunnel. You’ll also want to make sure you have gloves with you when doing this so you don’t get cut on the fiberglass.
Cordless Drill with Bits
Don’t skimp on the hardware. You need a nice clean mounting hole so make sure you have fresh, sharp drill bits and a high-quality power drill for the installation. This will help make installing a fishfinder that much easier.
Masking Tape
Using masking tape to prevent chipping and cracking of the gel coat is a nice trick I learned from a few different people. When you’re drilling into the fiberglass the tape will ensure that the coating doesn’t crack when the bit bites the hull.
Cable Ties and Wraps
If you take pride in the appearance of your boat then you’ll want to have plenty of cable ties and cable wraps to clean up the job. These will help ensure that you don’t have a ton of loose wiring hanging around.
Shrink Tube or Electrical Tape
You’ll want to keep the moisture away from your wire splices and the best way to do this is with shrink tubing or electrical tape. Shrink tubing is the recommended method for both safety and aesthetics but if you don’t have any and aren’t interested in making another trip, electrical tape will also work. You can also use barrel connectors but they offer the least amount of protection from the elements.
Heat Gun
If you’re using the shrink tubes, you’ll need a heat gun to shrink them over the connections. Be sure you’re extra careful when doing this and do not point the gun near the gel coat because it will melt and discolor it.
Inline Fuse Holder
These will protect your install by ensuring that spikes don’t damage the unit. There are a variety of different products you can choose from so you’ll want to check the manual that came with your fish finder to see what they recommend.
Wire Crimper
A wire crimper or stripper is a simple tool that strips and crimps spliced connections. This is an essential piece of the puzzle that everyone will need.
Stainless Steel Screws
Once you have a solid idea of how you plan to install your fish finder, you’ll need the right hardware. Stainless steel is the way to go because you’ll need protection from all the elements. Make sure you take the mounts with you so you can ensure you get the right size screws, washers, and nuts. They should be long enough so you can reach them under the boat or console. Sealant is also important for locking the hardware in place.
Unit Mounts
If you’re mounting a fish finder flush the manufacturer of the unit will likely sell you an accessory kit that you’ll want to use here. If you’re used to rigging things your way you can go ahead and put one together yourself.
RAM is the most popular mounting style (we’ll touch on this below) but there are a few other ways to go. Kong and BallzOut are other methods. Just make sure that the mount you choose can handle the weight of your unit without drooping.
Transom Saver Block
This is a smart strategy if you think that the transducer will have to get moved at some point. Instead of installing the transducer directly to the body of the boat, you’ll install the block and then install the transducer to the block. Now, you can move the block around the boat without having to remove the transducer each time.
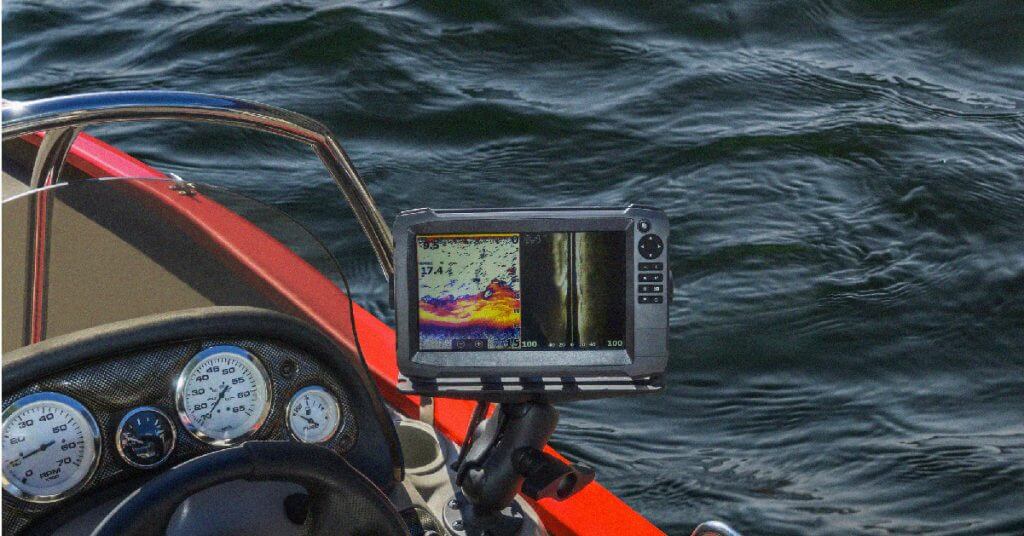
Types of Console Mounts
If you’re installing your fish finder in the console of your boat, you have three primary strategies. The one you choose depends on the size of your fish finder, how much room you have on the console, and the size of your boat.
In-Dash
This is what we call “flush” mounted fish finders. This is the most desirable look for a bass boat. It looks professional, it makes you look professional, and it creates a permanent home for the unit. Keep in mind that for a majority of fish finder installations, this method won’t work.
Gimbal
The gimbal is the adjustable bracket that comes with the fish finder. This is easy to mount if you’re dealing with limited space; it permits you to mount the unit higher so you can see it over the steering wheel. Once again, this won’t work for everyone and a lot of consoles on newer boats are made with mostly plastic so you’ll need to install an aluminum sheet to have a sturdy and safe place to mount the unit.
3rd Party Mount
If you’re looking for a bit more flexibility and you might have to move the unit from time to time, 3rd party mounts are the way to go. If you’re trying to figure out how to mount a fish finder and you need more control over the position, RAM and Kong mounts help you mount just about anywhere you want but they lack durability and strength, especially on heavier units.
Mounting a Fish Finder at the Bow
Some of you might conduct your fish finder installation on the bow. If this is the case, you’ll want to make sure you have enough space. You’ll also need to settle on an installation method that will vary based on how much room you have and how much you want to spend on accessories.
If you’re using a kayak with a fish finder mount on the front, this method might work for you too. Just keep in mind whether or not you have a side imaging or down imaging fish finder. Anglers of all types will want to address these mounting options to determine if installing their fish finder at the bow of the boat is the right choice for them.
Flush
I think this method isn’t that common because it requires a pretty precise boat shape but it can work for some boats with the right panel and design. The problem is, it’s a bit far away and you can only install it at a fixed angle. If you end up with a glare on the screen, forget about it.
Gimbal
If you’re installing the unit on the bow, my personal recommendation is a gimbal mount. It helps you raise the fish finder up a little so you can adjust the viewing angle. This gives you the flexibility needed to settle on a position. The only problem is, once you place the bracket, you’re stuck with what you’ve got so be sure to get it right. This method can also take up any extra space you might have for rod storage.
3rd Party
RAM and Kong mounts are great if you need something you can move around and switch between positions. The problem is, you can’t use it if your boat has a recessed foot pedal. Make sure to choose one without the rubber ball joints because they don’t move and droop as easily if you hit choppy water.
Bridge
Bridge mounts look great, they fit right in place where you want them, they offer a decent height and position for the unit, and there are plenty of great brands out there. Companies like Wave Tamer and Dek-It sell bridge mounts and these are basically metal brackets that go over the outboard motor pedal recess; right behind the pedal at the front of the boat.
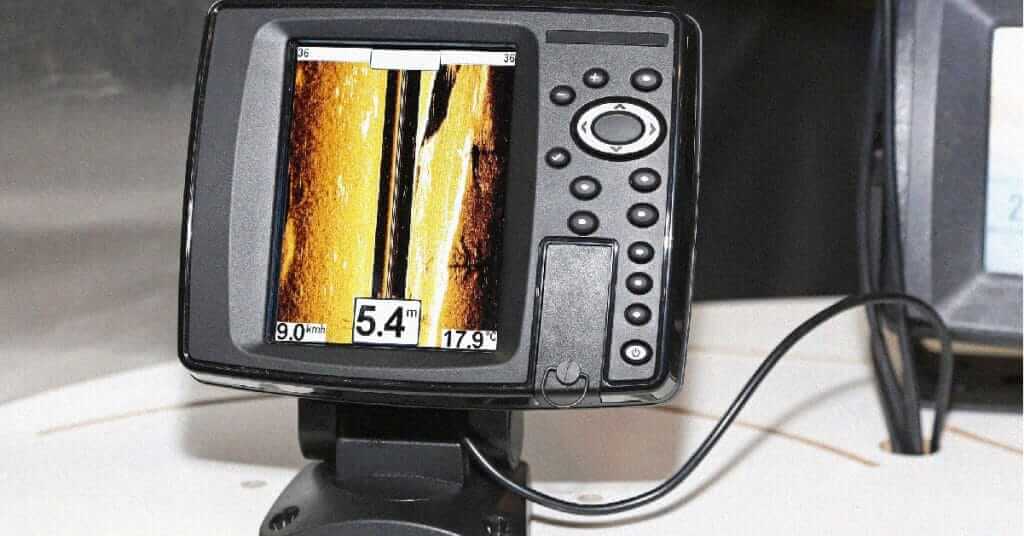
How to Install Fish Finder Transducer
Understanding how to install a fish finder properly comes down to the installation of the hull transducer. If you don’t install this right, you’ll end up with low performing sonar that you’ll likely blame the manufacturer for.
Keep in mind that any information you learn in this section does not supersede what the manufacturer’s instructions tell you to do. These are just general informational overviews but you’ll want to refer to the manual when determining where to put the transducer and how to install it.
Fiberglass
If you have a fiberglass hull you’ll want to install the transducer on the transom or jackplate. Typically, smaller units go on the transom and bigger ones go on the jackplate. Make sure there are no obstructions anywhere near the transducer and that includes temp and speed sensors. Transducer shields are great for protecting your transducer from stumps and rocks and even though they’re a bit expensive for a piece of plastic, they’re well worth it compared to how much you spent on your fish finder.
Aluminum
The main thing to remember with aluminum boats is that you don’t want to install the transducer near the riveted or welded joints because it will create air bubbles which will hurt your image quality. Most people will likely have to go with a through transducer because they don’t read well through this material.
Trolling Motor
If you don’t know how to install a fish finder you can purchase a kit that will help you mount it to the trolling motor. These kits are usually pretty low quality but they’re easy to use and great for beginners.
Running Wires For Your Fish Finder
Fish finder wiring is probably the most daunting part of installing fish finders. Not all boats are the same yet a lot of instructional “how-tos” will make you feel like they are. There are a few important things I want everyone to remember when wiring their fish finder.
Using a snake for the wires will help you pull the wires through instead of having to remove boat panels. Keep in mind that you can also use existing wires to pull the new ones through. Sometimes there are wires that will never get used, you can use them to help pull or push all the new wiring through.
A great expert tip that I’ve learned is to run a few extra wires when you do this. Once you’re already involved in the project, adding a few extra wires is simple and you’ll be glad you did if you want to do something else like add lights down the road.
When you’re running the wires from your trolling motor to a bow-mounted unit, you need to make sure they don’t get caught in the motor. For this, a clean and aware installation is important. Pay attention to how you’re installing everything and be sure to attach the wires to the trolling motor shaft temporarily and test out the motor in different positions to see if there are any conflicts.
To find wiring diagrams, refer to your fish finder manufacturers’ website. For example, if you purchased a Humminbird fish finder, they have all the information you’ll need right here.
Garmin offers instructions on transducer location, transducer mounting, and transducer wire here.
FAQs
How to wire a finder to a fuse box
It’s much simpler than you think. Just keep in mind that most fish finders will draw 1.5 amps but the fancier fish finder GPS combos will take more like 3-4 amps. You’ll connect the fuse block to the cranking battery with a marine-grade fuse holder and in-line fuse going from the battery to the block.
This is the more common method for wiring fish finders because it’s less messy and it helps you to troubleshoot problems much easier. The only issue a lot of people have is that it causes interference with the readings.
How to install a fish finder on a kayak
The method you use to install a fish finder on a kayak will depend on a bunch of different factors. The type of fish finder you have, the type of kayak, where you want to install it, and more. The most important thing to remember is that portability will be a factor with your kayak so it’s best that you don’t install a permanent fixture on it.
Final Thoughts
DIY Fish finder installation is a lot less complicated than many people make it out to be. It’s as simple as just following the instructions the manufacturer lays out for you with help from guides like this one. I’ll help you decide on a method of installation and a strategy but overall, the manufacturer is the only one who can tell you exactly how to install the specific unit step-by-step. Make sure you’re careful, cautious, and double-check everything. Good luck!

Aluminum
The main thing to remember with aluminum boats is that you don’t want to install the transducer near the riveted or welded joints because it will create air bubbles which will hurt your image quality. Most people will likely have to go with a through transducer because they don’t read well through this material.
The statment that people will want to go with a thru hull transducer on alum. Boats is coompletly wrong. A transducer will not read thru alum. It will read thru fiberglass though. But you also need to think about what that transducer is capable of if it is a side scan it will always need to be mounted on the outside of the hull if it is a 2d sonar it could be mounted in hull though not many depth finders come wit this as their primary sonor it is common to mount a 2d transducer in the hull of a fiberglass hull to enhance the standard transducer the depth finder came with